DIY Macrame Tote Bag (Tutorial)
Creating your own macrame tote bag is one of those projects that feels both practical and deeply rewarding - something you can use every day, whilst enjoying the slow, calming process of making it by hand.
In this tutorial, I’ll guide you step-by-step through how to make a macrame tote bag using just one simple knot. Whilst the technique itself is easy to learn, the overall design is more detailed and structured than smaller beginner projects. This is what gives the bag its strength, shape, and beautifully finished look.
It’s this balance that makes the project so satisfying. As you settle into the rhythm of repeating the same knot, the process becomes almost meditative. The design gradually comes together into something that feels far more intricate than it actually is.
By the end, you’ll have a sturdy, statement tote bag that’s not only functional, but something you’ll feel genuinely proud to have made yourself.
Before you start…
If you’d like help calculating exactly how much cord you’ll need for your projects (especially when resizing designs), I’ve created a free macrame cord calculator you can use again and again.

Materials
5mm Cotton Cord (134m)
Fabric Scissors
Masking Tape
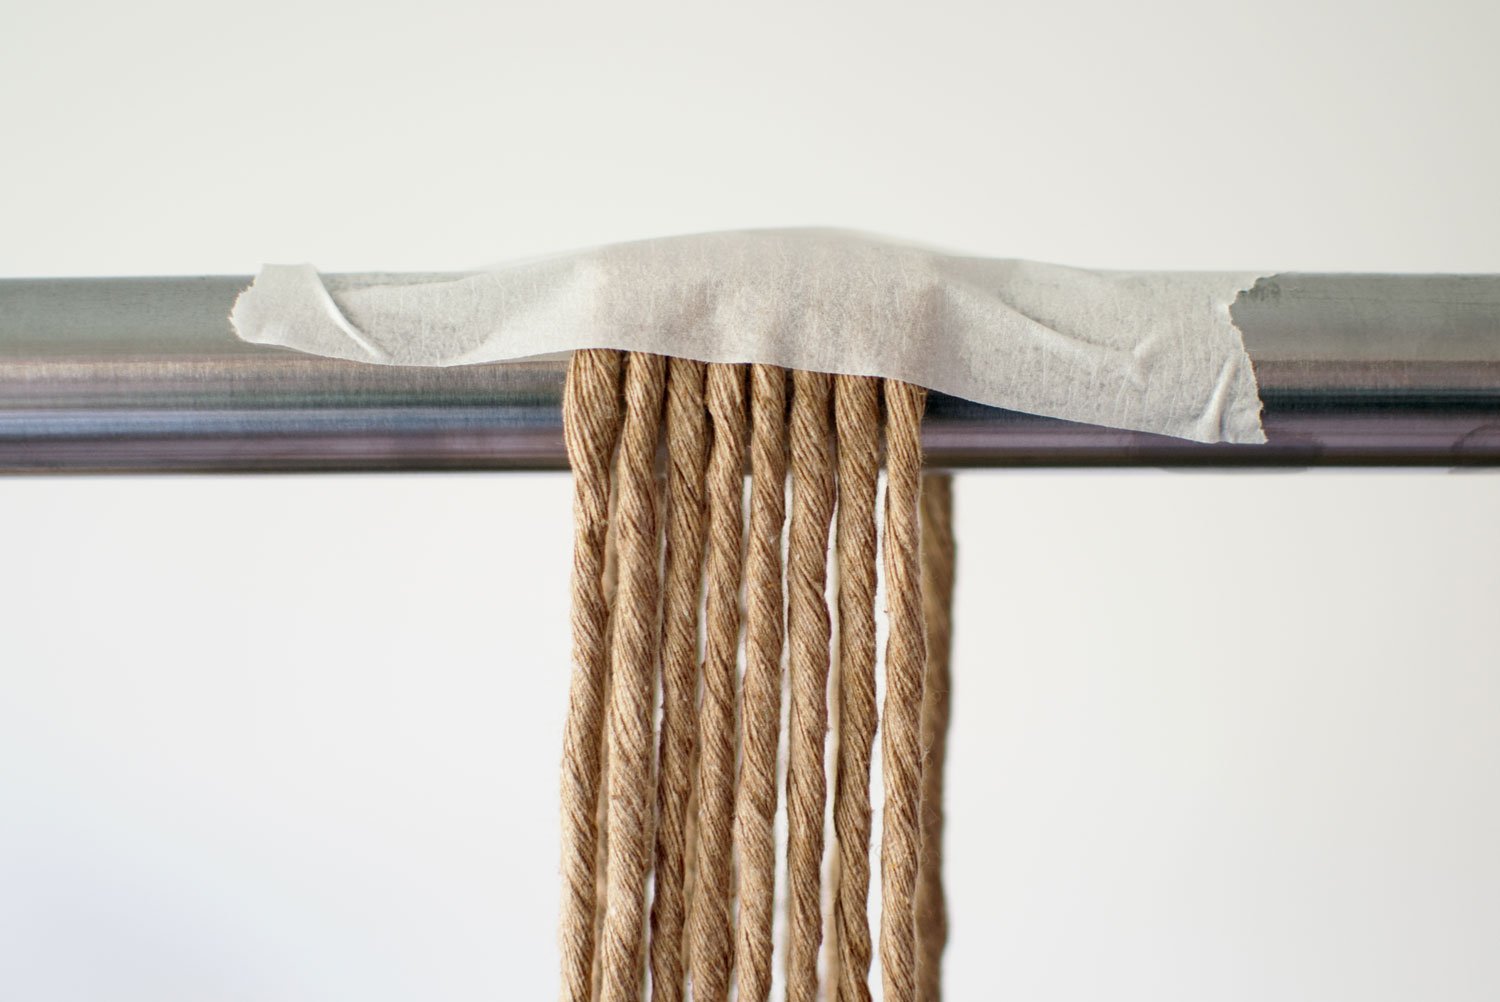
1. Prepare the materials
Gather your spool, masking tape and scissors. Cut 8 x 4.3m lengths of cord. Fold them in half and place them on a pole. Secure in place with some masking tape.
Top Tip: If you’re planning to customise this, use my cord calculator to help with adjusting the size.

2. Make the handle
Start with making two square knots, then create a third knot using the middle cords so it sits just below the two. Repeat this pattern until you have 22 rows in total.

3. Repeat step 2
Turn it around and repeat step 2 until you have 45 rows in total. Make sure both sides end on a row of 1 square knot as opposed to two.

4. Make the body
Cut 16 x 2.8m lengths of cord and attach one at each end of the handle to create a row of 3 square knots.
Form the next row below by creating square knots using the alternate cords. Repeat until you’ve used all 16 cords.
5. Repeat step 4
Turn it around and repeat step 4.

6. Attach additional cords
Cut 4 x 2.3m lengths of cord and attach them onto each end, so you’ll have 2 extra lengths on each section of the bag body.

7. Connect the bag together
Connect the two sections of the bag body together with a square knot. Turn it around and repeat this on the other side.

8. Finish off the body
Continue the pattern all the way around until you’ve made 25 rows of square knots. Count the rows from the connecting square knot.
This is quite a time consuming section so make sure you’ve got a cup of tea or a coffee to help get you through it.
9. Turn the bag inside out

10. Create the base
Flatten the bag and then rotate it on its side so you’ve got one layer of square knots lined up properly. This will allow you to find the filler cords at the bottom of the bag. Keep those two cords separate.
Make a square knot using the outer cords. Make sure these square knots are tightly knotted together.
After each knot, miss out one outer cord on each side. Move them out of the way and then continue to make square knots. Stop until you reach the middle of the bag.
Gather the filler cords and tie a knot so you don’t lose them.
11. Repeat step 10
Turn the bag around so you can continue on the other side where you will meet again in the middle.

12. Finish the base
Untie the knots from the filler cords and then create a loop using them both.
Use your finger to hold that loop in position. Then make a square knot with the remaining outer cords. Turn the bag around and make another square knot.
Using the end sections of the looped cords, pull these together as tight as you can.

13. Trim the cords
Trim the cords leaving a few cms in length. Then turn the bag outside in, so the trimmed cords remain on the inside of the bag. Use your hands to structure the bag as needed.

Want to make another?
If you enjoyed this project and want to keep creating, I’ve put together a free macrame cord calculator to help you plan your future designs with confidence.
Need more guidance?
Or, if you’d prefer a guided project with everything planned out for you, you can explore my full patterns and kits below.