DIY Daisy Chain Macrame Plant Hanger (Tutorial)
An intermediate plant hanger design that’s fun to make with a unique look.
Even if you are a beginner or you’ve never made a plant hanger before, you’ll still be able to follow this tutorial with ease.
You’ll learn 4 different types of knots - the square knot, half hitch, double half hitch and the gathering knot.
This tutorial also includes a video that you can follow along with as you make the hanger, so don’t worry if you get stuck on one of the steps.
Now, grab your favourite hot beverage and let’s get started…

Materials
1 x wooden/metal hoop
3 x 4m lengths + 1 x 1m length of white cotton cord
3 x 3.2m lengths of green cotton cord
3 x 2m length of yellow cotton cord
Fabric scissors
Measuring tape

Step 1 - Attach to the Hoop
Take 1 of the 4m lengths of white cord and feed it through the wooden hoop so that the halfway point sits on the hoop.

Step 2 - Make Two Square Knots
Take one of the green cords and fold it in half. Place the halfway point behind the white cords just underneath the hoop.
Make two square knots by forming an ‘L’ shape with the left green cord. Then take the right green cord place if over the left green cord behind the white cords and through the ‘L’ shape. Pull the green cords to tighten. Reposition the knot so it sits right underneath the wooden hoop.
Repeat this step but alternate it by using the right green cord first to form the ‘L’ shape.
You’ve now created the first square knot. Repeat the previous steps again to form the second square knot.
Step 3 - Insert the Yellow Cord
Bring the two green cords in front of the white cords and place one over the other. Hold it there using your fingers.
Then bring one white cord underneath the crossover point, over and through the white and green cord. Repeat this step with the other white cord. Then pull the cords that hang downwards slightly so the white cords come together.
Feed the yellow cord through the loop that the white cord has formed so that the yellow cord sits in between the white and green cord. Pull it further through until it reaches the halfway point of the yellow cord.
Using the white and green cords on both sides, pull them gently to tighten the knot so that it sits underneath the square knot.

Step 4 - Create the Flower
Bring the left green cord to the front, then take the white cord that’s next to it, fold it over and through the loop. Whilst holding the green cord at an obtuse angle, pull the white cord all the way through to tighten it to form a half hitch knot. Repeat this step again to form a double half hitch knot.
Repeat the previous step for the right side. Ensure the angle of the green cord points towards the middle yellow cords not away from them.
Bring the white cords together and place one over the other, hold it using your fingers. Then bring the yellow cord under the crossover point, over and through the loop. Repeat with the other yellow cord. Gently pull the yellow and white cords together so it sits just underneath the white cords.
Repeat the double half hitch knot step on both sides.
Bring the green cords together and place them over another, hold using your fingers. Then bring the white cord under the crossover point, over and through the loop. Repeat with the other white cord to finish off the flower.

Step 5 - Make 6 more Flowers
Repeat steps 2-5 so you have a daisy chain of 7 flowers in total.
Make sure to include both white and yellows cords when forming the square knots.

Step 6 - Create 2 more Daisy Chains
Repeat steps 1-5.
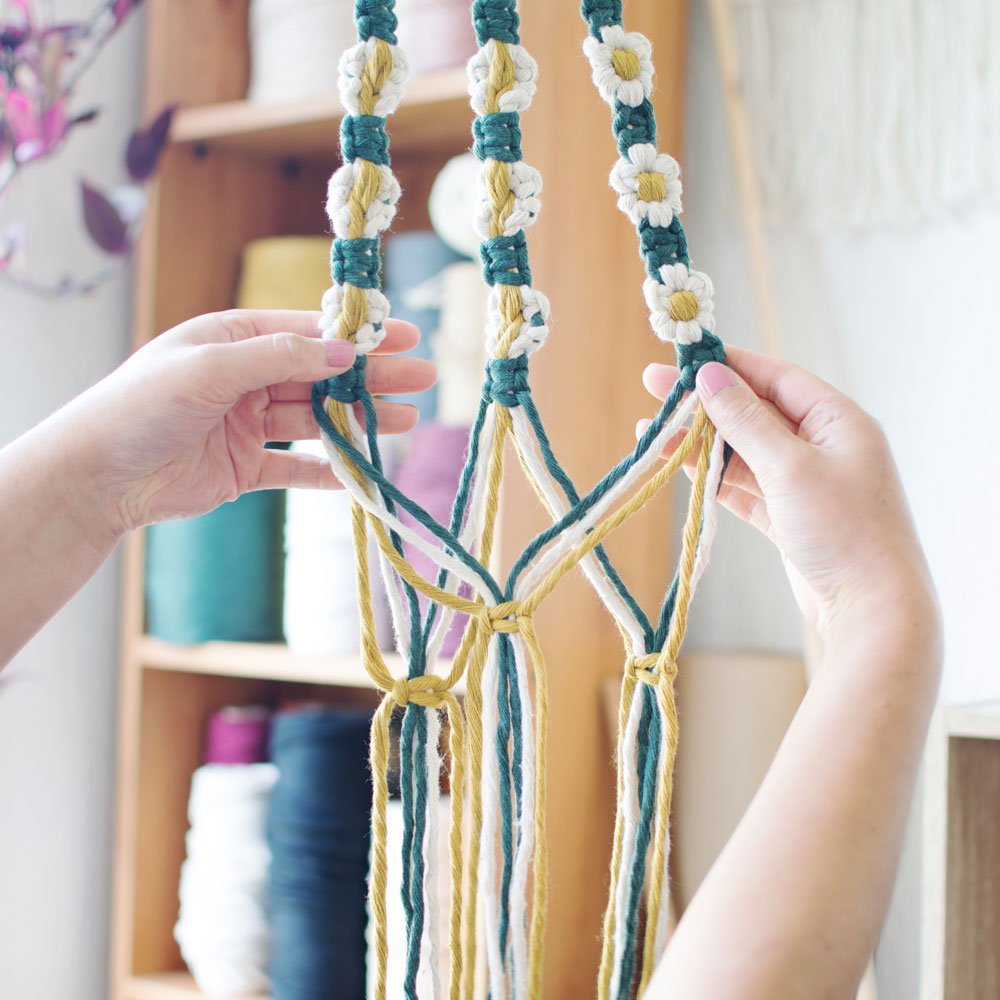
Step 7 - Form the Plant Hanger Base
You now need to join the chains. Bring two chains together and leave approximately 11cm gap. Make a square knot using the yellow cords so that 2 green and 2 white cords sit in between the square knot.
Repeat this step 2 more times with the other chains so that they are all connected.

Step 8 - Close the Base
Tie all the cord lengths together with a wrapping knot to finish off the base. Take your remaining piece of white cord and place it in front of all the cords a few centimetres down from the square knots. Hold it in place with one hand.
Make a loop with the white cord and hold it in place. With the rest of the white cord tie it around all the cords about 5 - 10 times. Feed the cord through the loop you created and pull it tight so the knot goes underneath the wrapping knot.
Cut the remaining white cord at the top and press it into the wrapping knot. You can either leave the other end if your white cord is long enough. Then cut the rest of the cords so they are all the same length. Where you cut depends on how long you want the plant hanger tail to be.
Time to find the perfect houseplant!
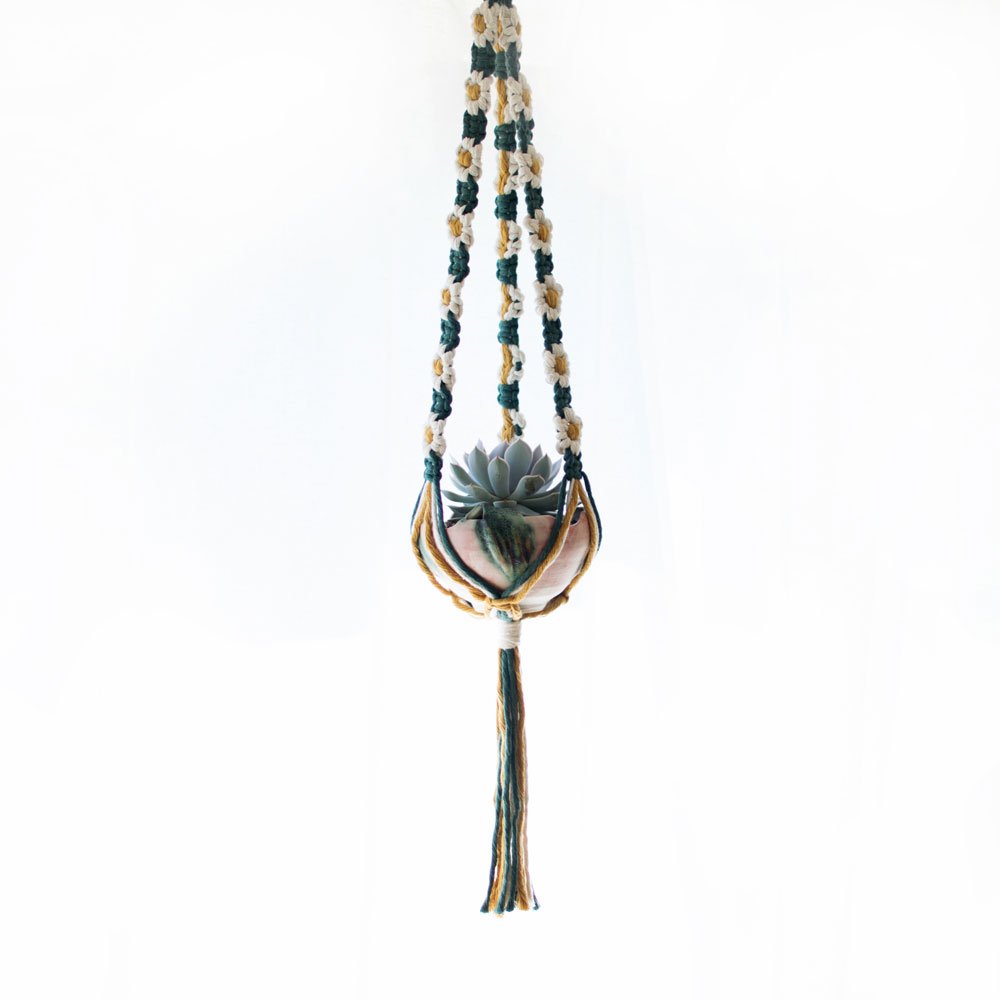
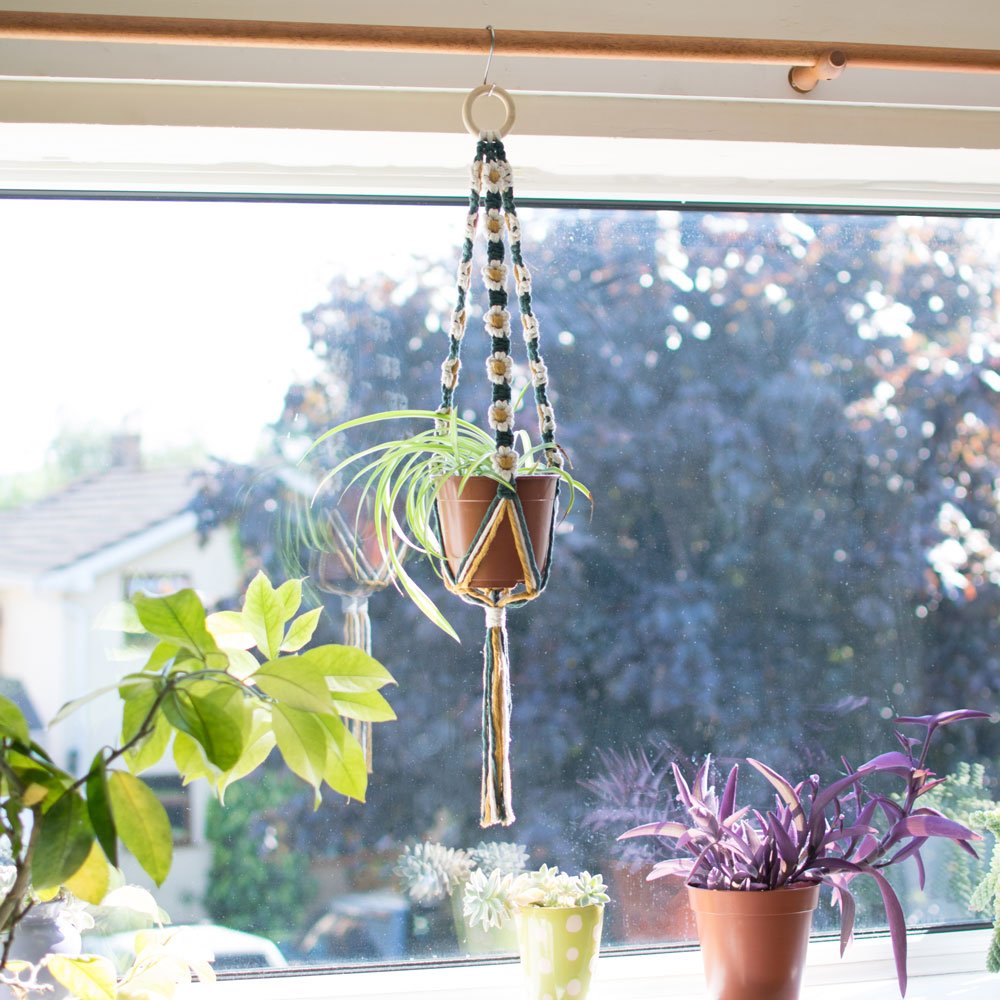
Well done on making this plant hanger!
The end result really does make it worthwhile and you’ve now got a brand new home for your plant.
Let me know in the comments which houseplant you choose to hang in it. Want to make this even easier? Grab the kit for this exact plant hanger here.